


GET YOUR FREE ESTIMATE.
Our Process
The Maverick advantage
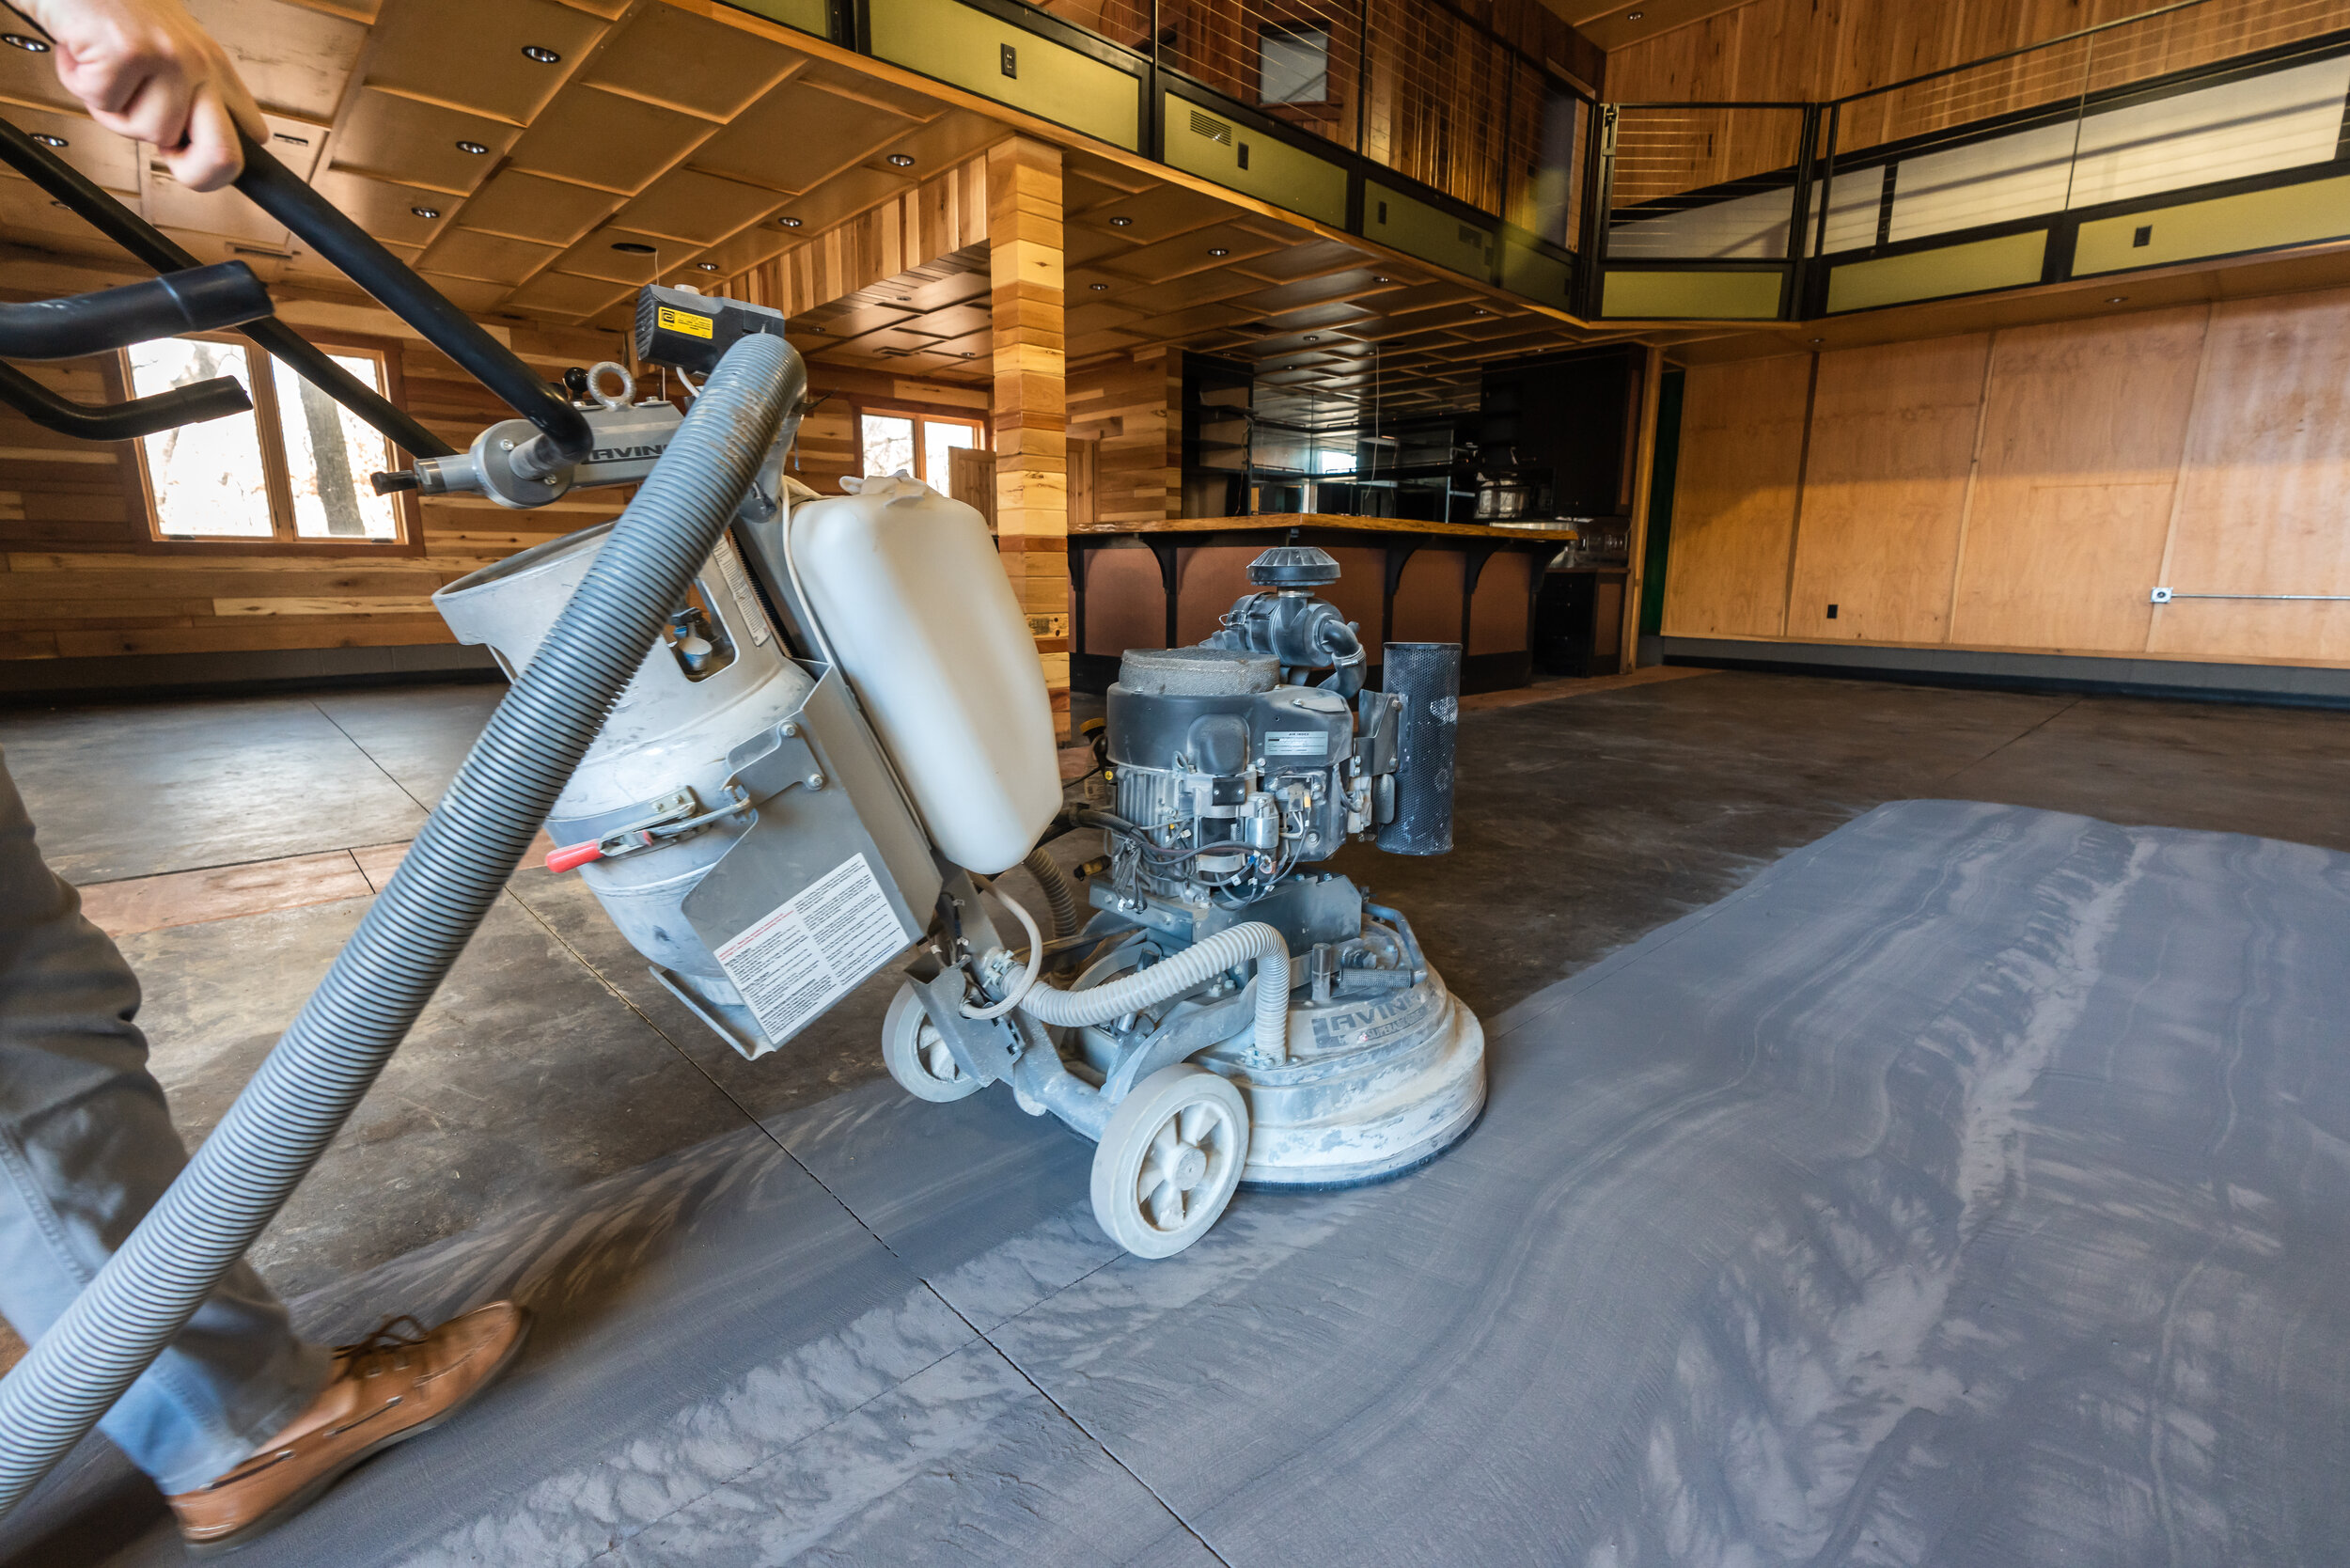
PREParation
Using industrial diamond disk grinders, Maverick certified technicians prepare the surface of the floor. After exposing a fresh, clean surface your floor is evaluated for cracks and divots, which are filled with a fast-setting super-elastic mender as needed. Our team maintains a clean area by working with a custom HEPA vacuum system to eliminate dust and debris before it even has a chance to settle. This reduces the mess and allows us to finish the floor in just one day in most cases.

Base layer
After our installers have professionally prepared the area, they apply a base layer to the floor. The material actually soaks into the freshly ground concrete to form a nearly unbreakable bond, unlike epoxy garage floors that merely sit on top of the concrete. This compound can be used any time of year, whether it’s the heat of the summer or those long cold days of winter.

Color Chips
We then broadcast your favorite choice of color chips directly onto the base layer to add texture and beauty to your garage. Next, the floor is scraped smooth to remove excess chips and render a slip resistant surface.

Topcoat
Once the base coat and color chips are in place, Maverick completes the process by carefully applying a layer of Polyaspartic to protect and seal the base and chip for the lifetime of the floor. This proprietary blend of ultra high solids Polyaspartic, is 20 times stronger than epoxy floors and is 100% UV stable so you will never have to worry about it yellowing.
THE RESULT
A few hours after we leave your floor is ready to walk on and just 24 hours after application is able to be driven on. No more waiting days to move all your stuff back into your new beautiful space.